ESP32 Read DHT22 Sensor using Arduino

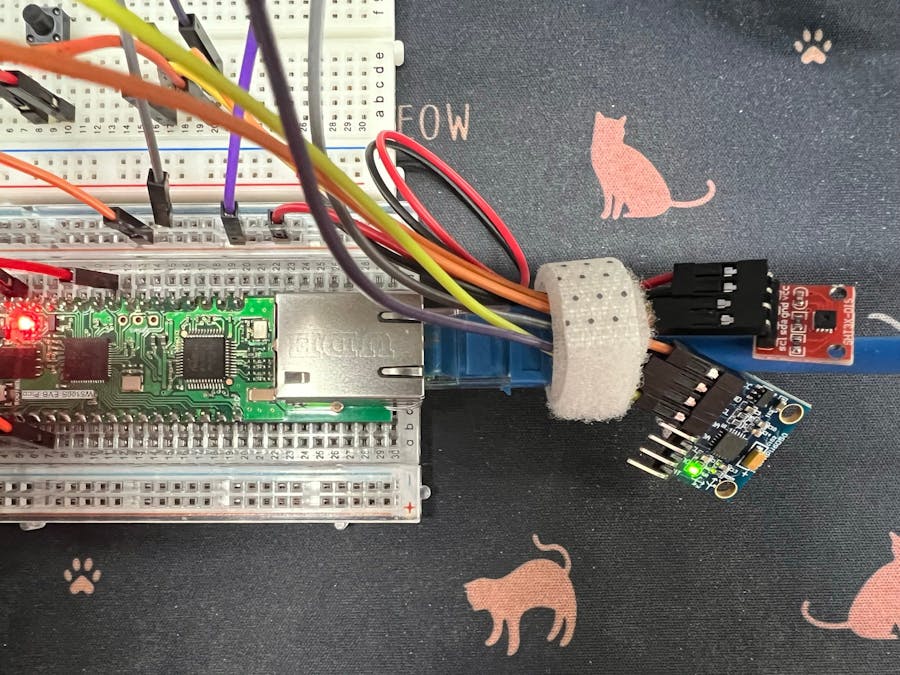
I'm using nodemcu with Blynk server Aim: 1)To read 8 different sensor values. 2) read temperature and humidity using DHT11. 3) control 4ch relay using physical push button+ Blynk application (virtual buttons). Procedure: 1)To read 8 different sensor values, since nodemcu has only one analog input pin so I used 8-1multiplexer(4051be) that uses digital pins to switch between different sensors.
How to Use DHT11 and DHT22 Sensors with Arduino Easy Tutorial NerdyTechy

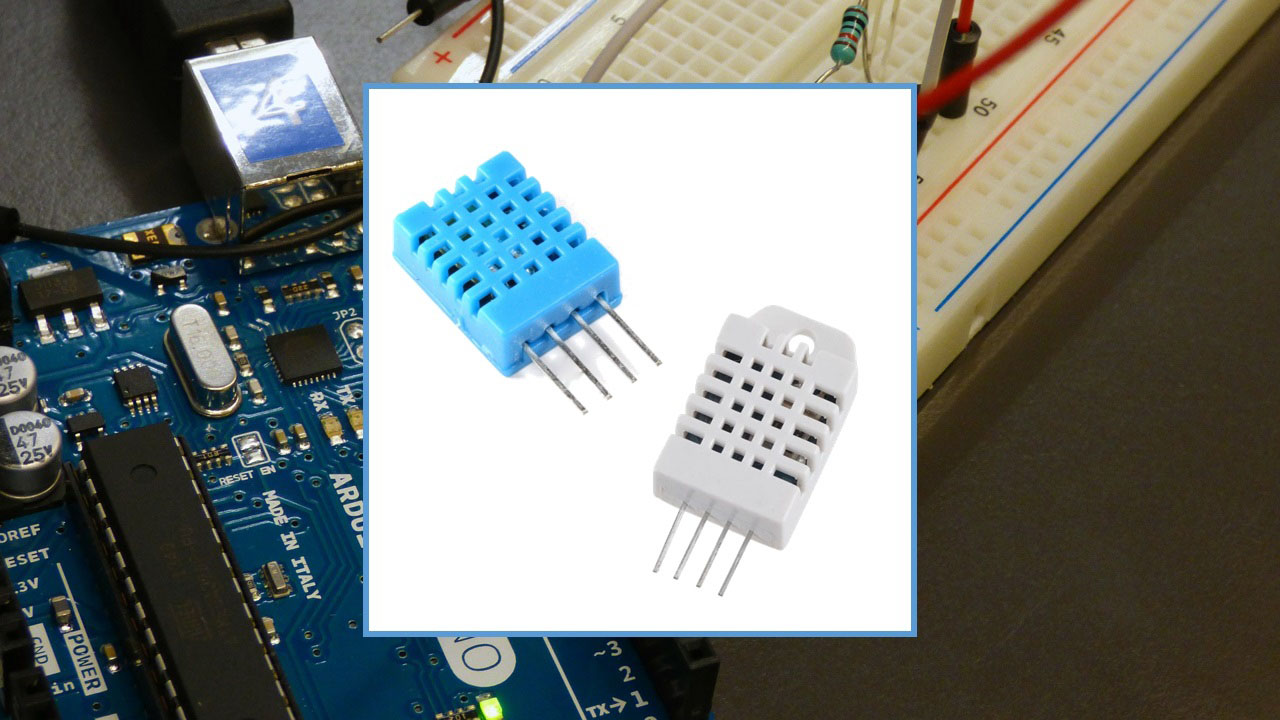
Pinout. DHT22 has two forms: sensor and module. DHT22 sensor has four pins: GND pin: needs to be connected to GND (0V) VCC pin: needs to be connected to VCC (5V, or 3.3V) DATA pin: the pin is used to communicate between the sensor and Arduino. NC pin: Not connected, we can ignore this pin. DHT22 module has three pins:
DHT22 Setup, with Simple Error Checking Hackster.io
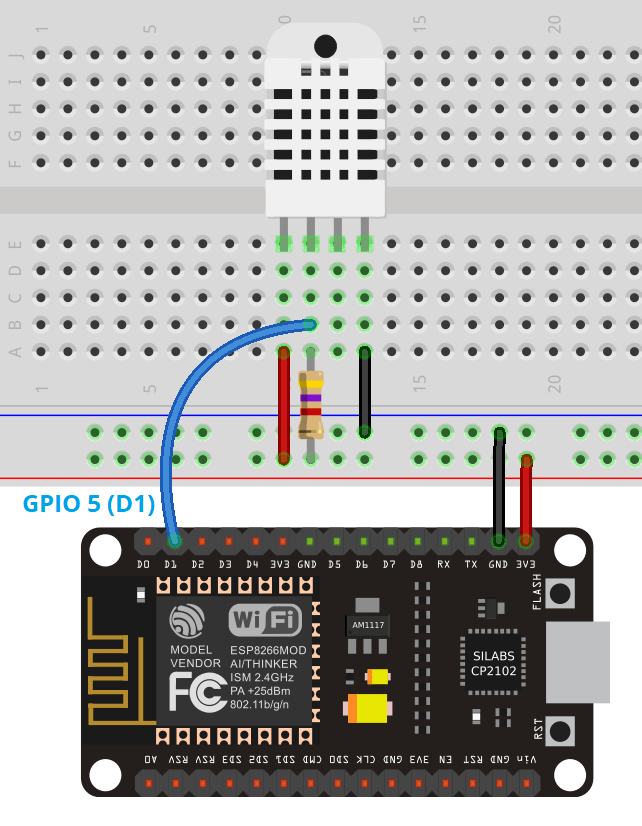
Initialize DHT11/DHT22 Sensor. Now inside this function, first line will initialize the serial communication with the baud rate of 115200 and the pinMode function will make the GPIO pin four as a digital input pin. The dht.begin() function initialize the DHT22 sensor and we can read temperature and humidity values from DHT11/DHT22 sensor.
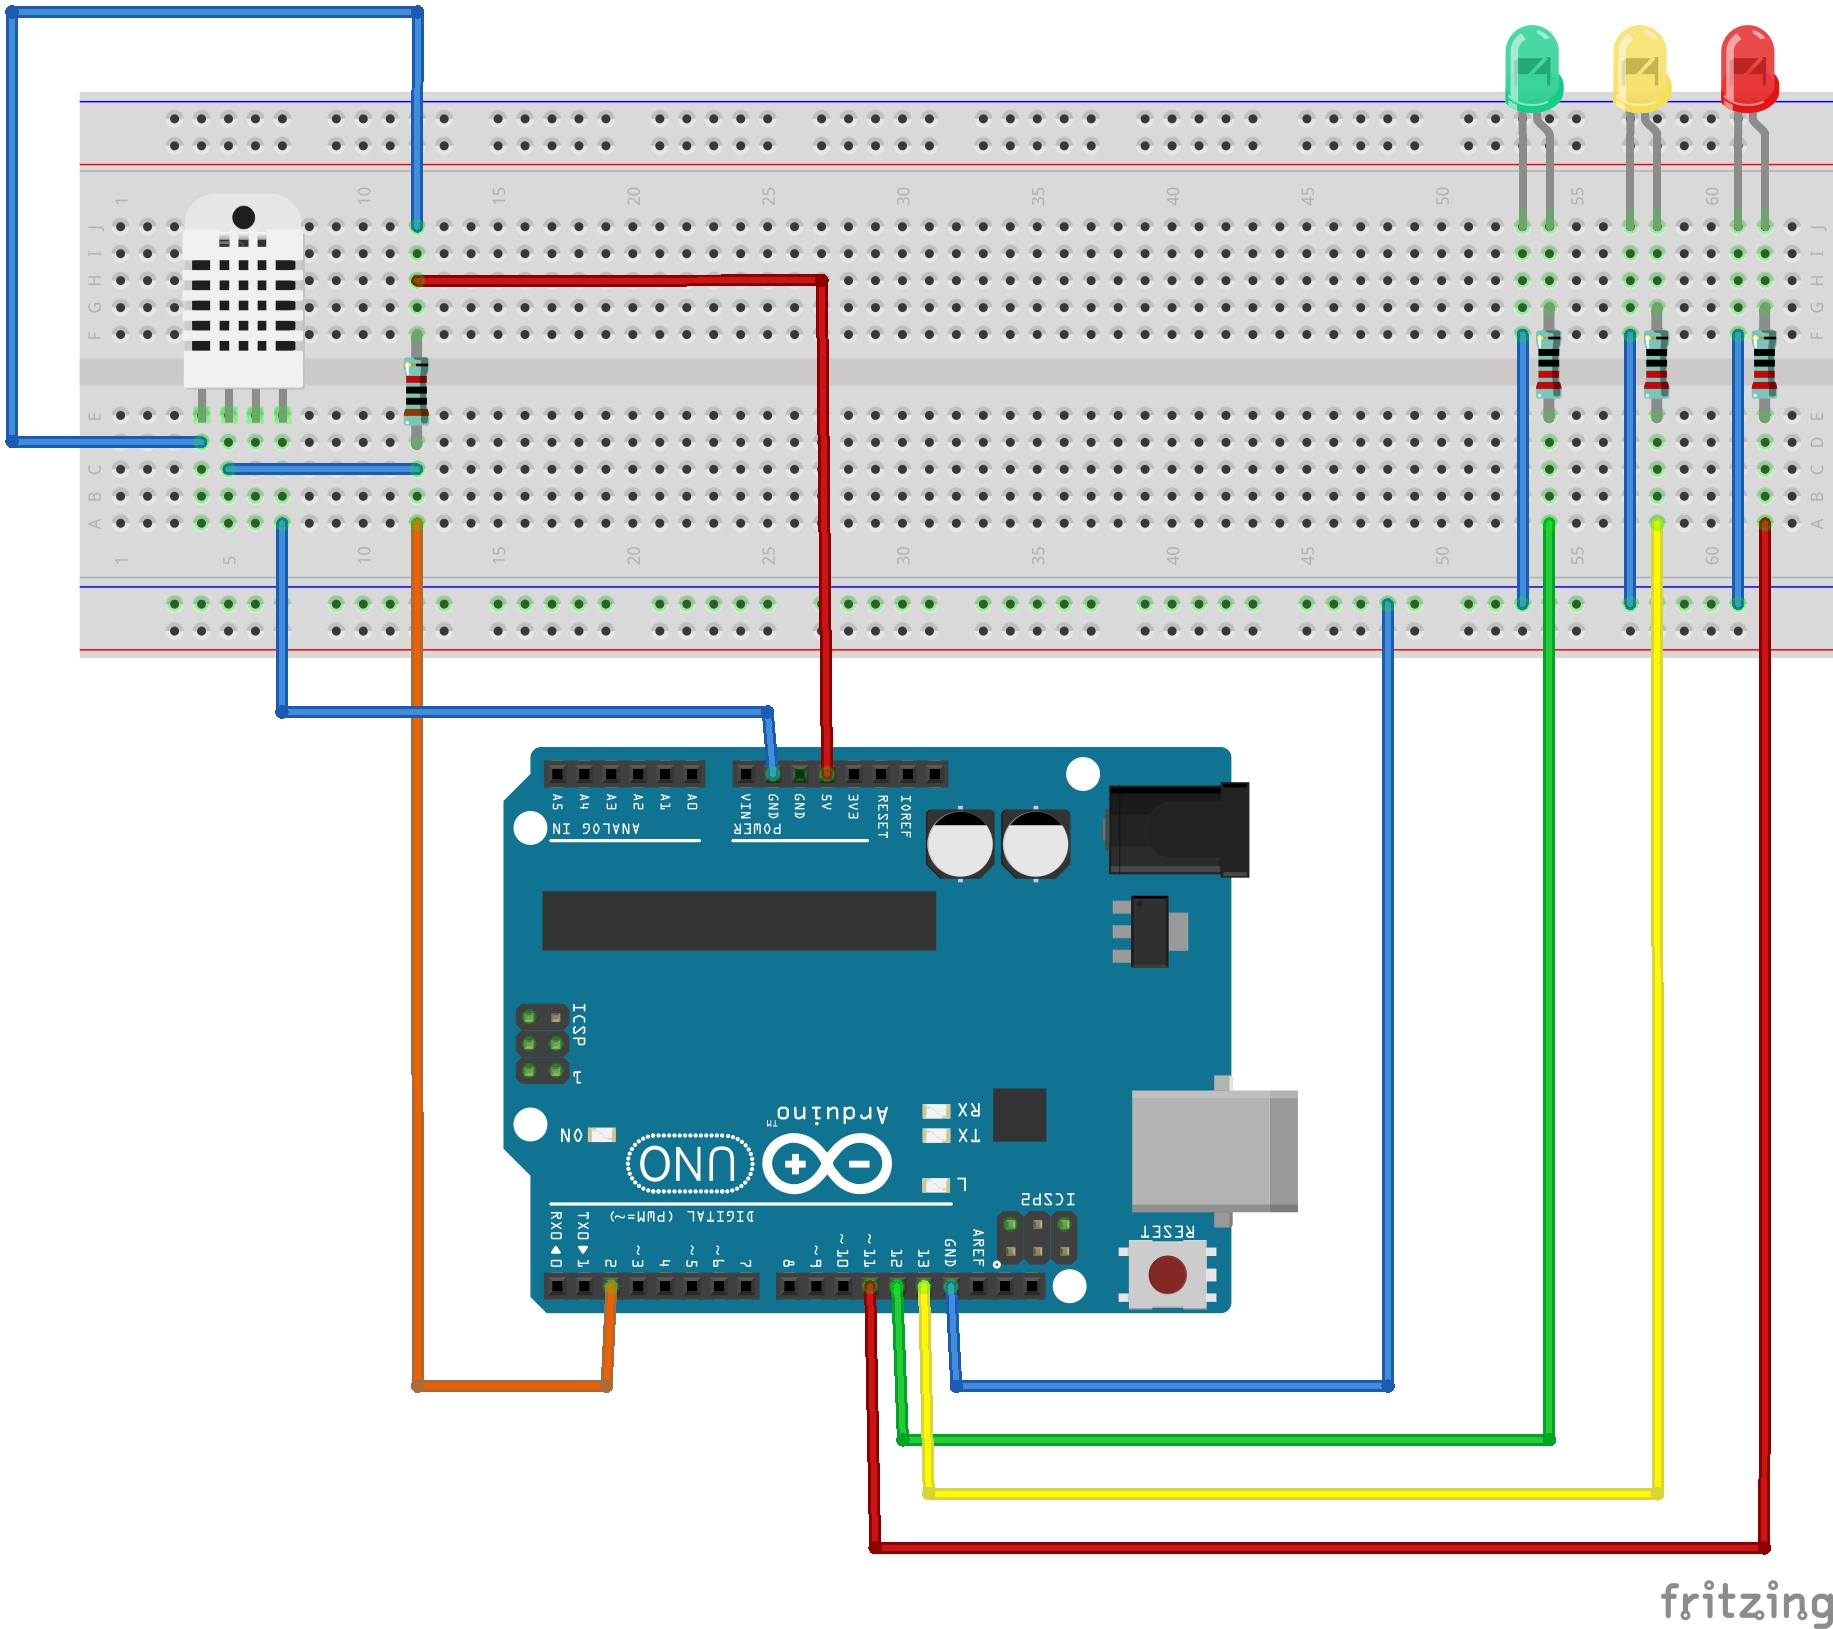
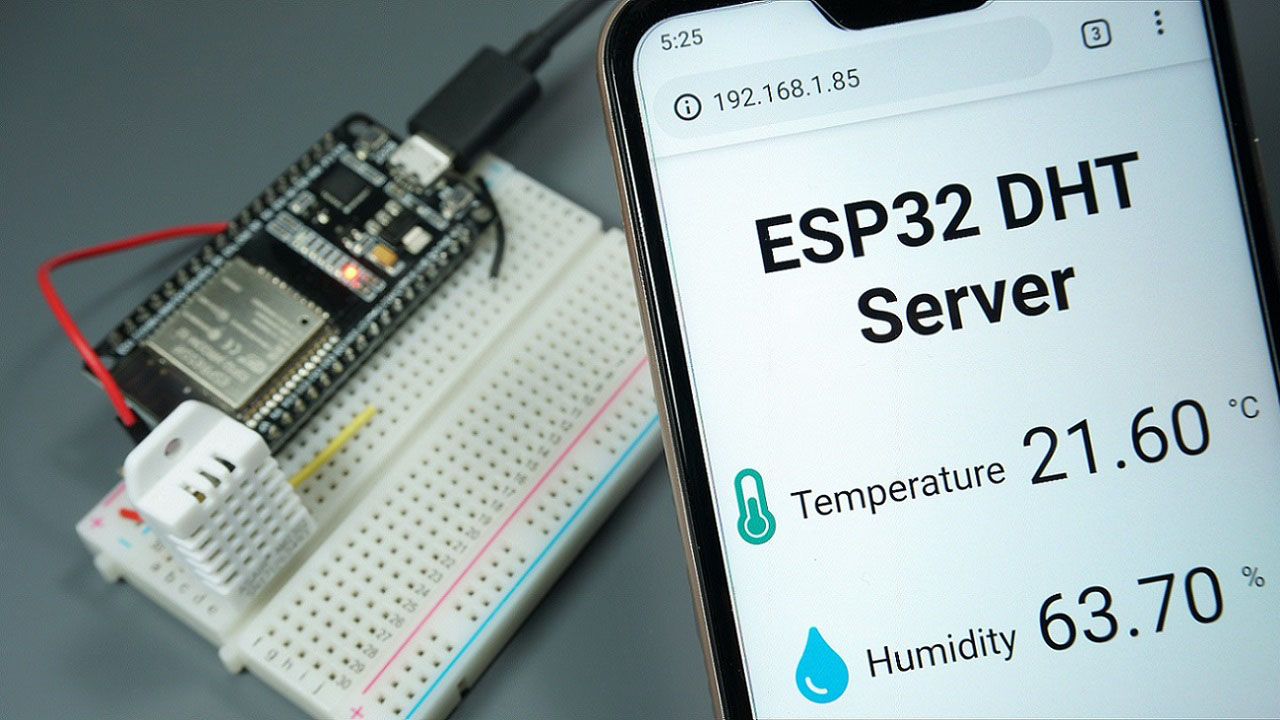
ESP32 DHT11/DHT22 Web Server using Arduino IDE Random Nerd Tutorials
The DHT sensor has an operating range of 3V to 5.5V (DHT11) or 3V to 6V (DHT22). If you're powering the sensor from a 3.3V pin, in some cases powering the DHT with 5V solves the problem. 3. Bad USB port or USB cable. Sometimes powering the ESP32, ESP8266, Arduino or similar boards directly from a PC USB port is not enough.
DHT22 SENSOR SUHU DAN KELEMBAPAN MENGGUNAKAN ARDUINO LAB ELEKTRONIKA

To test the code, simply compile it and upload it to the ESP32 using the Arduino core, assuming that the wiring between the device and the DHT22 sensor is already done and the power is on. Once the procedure finishes, open the Arduino IDE serial monitor. It should start printing the measurements periodically, as shown below a figure 1.
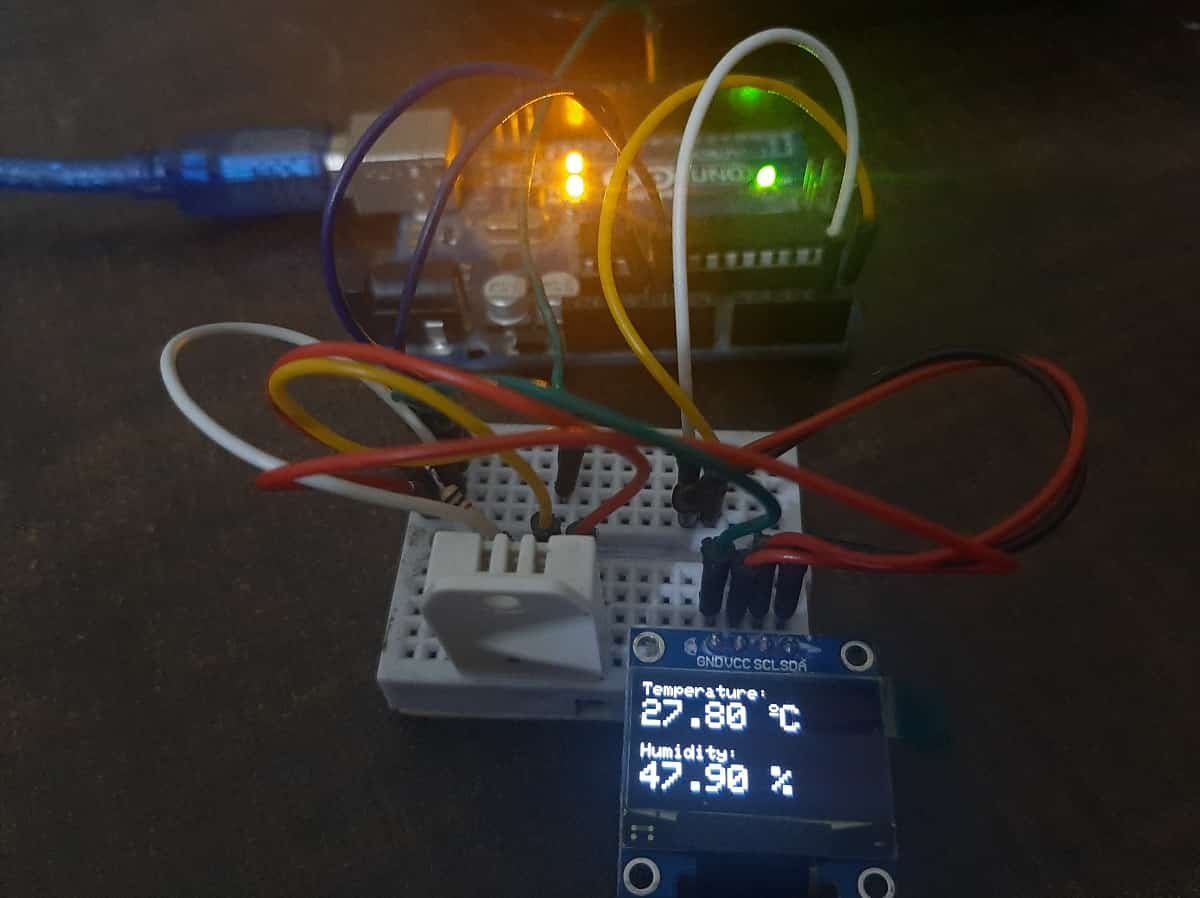
Interface DHT11 DHT22 with Arduino Display Readings on OLED
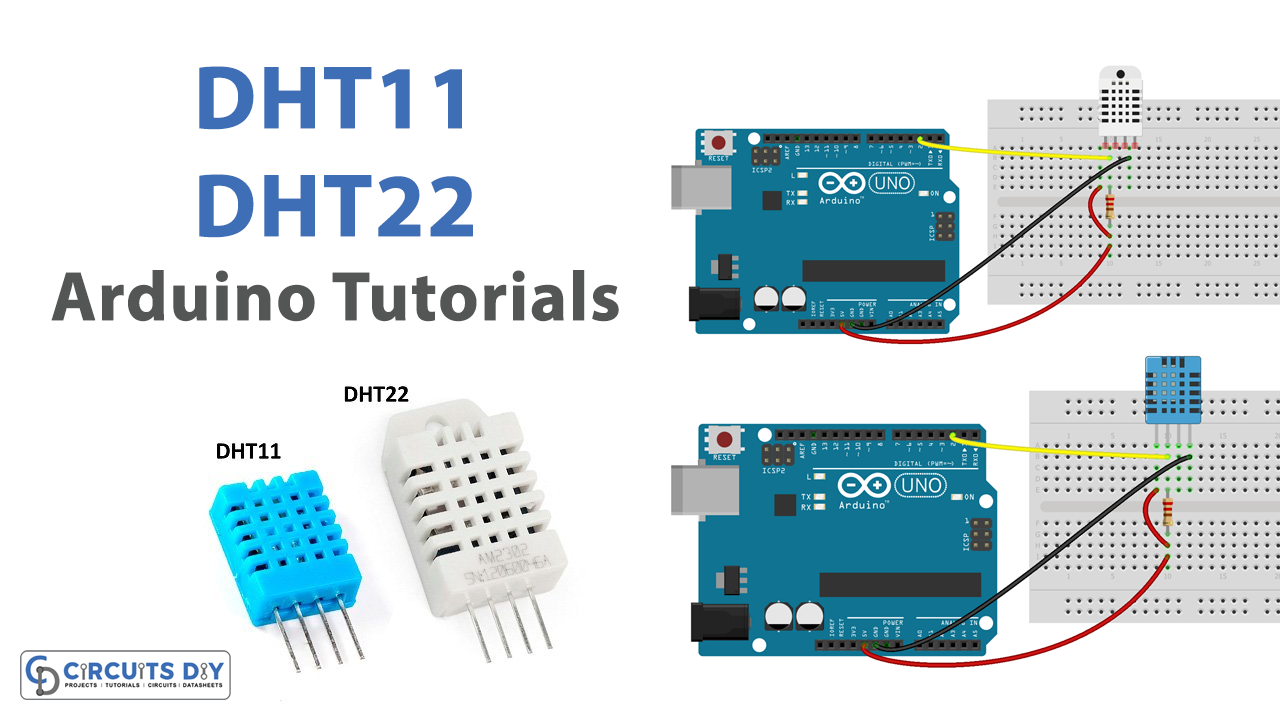
Arduino UNO. 3. Resistor 221 ohm. 1. Resistor 10k ohm. 1. DHT22 Temperature Sensor. Apps and platforms. 1. Arduino IDE. Project description. Code.. 24 // Read temperature as Celsius 25 float temp1 = dht. readTemperature (); 26 27 28 // Check if any reads failed and exit early (to try again).
Demo 3 How to use Arduino ESP32 to read temperature/humidity from DHT11/DHT22
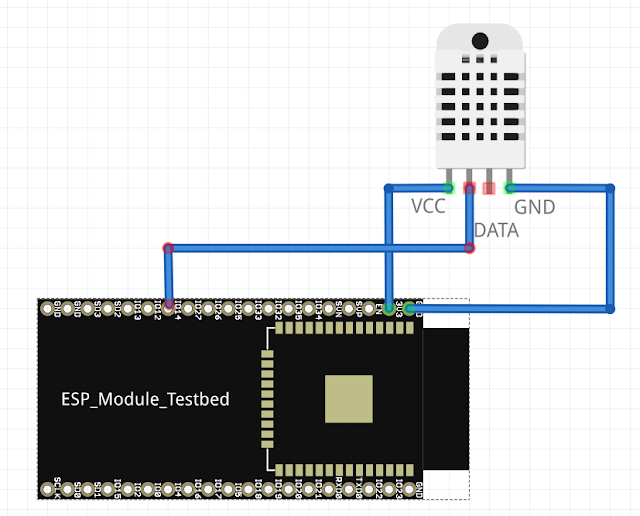
DHT11 and DHT22 Pinout. Connecting the DHT11 and DHT22 sensors is a straightforward process. These sensors have four pins with specific functions: VCC: This pin is responsible for providing power to the sensor. While the supply voltage can range from 3.3V to 5.5V, it is recommended to use a 5V power supply.
W5100SEVBPico FreeRTOS Sensor Monitoring with the NodeRED Hackster.io
I use DHT22 and DHT11 sensors for my project , in this project i would to build a data logger for refrigerator. So i use DHT22 for External sensor (put it in Refrigerator) and DHT11 for internal sensor (put it in box that Arduino is there). DHT11 is good and show temp and humid normally but DHT22 after hours (for example 10 hours) failed to read.
14c Esp32 Dan Dht22 Ke Thingspeak Wokwi Arduino And Esp32 Simulator www.vrogue.co

First, make sure you have Location and Bluetooth on. Anyone working with beacons will usually need to have both Android and iOS devices to diagnose problems. Run the app (and nRF Connect) on multiple phones of different platform type (iOS/Android) to help narrow down problems. If you still can't get it working, send us a support ticket.
DHT11/DHT22 Sensor with Arduino Random Nerd Tutorials
While sending the data the DHT11 sensor sends MSB (Most Significant Bit) first. A total of 40 bits are sent, which means Arduino receives 5 bytes of data in MSB first manner. Consider the data received from the DHT11 Sensor is. 00100001 00000000 00011010 00000000 00111011. This data can be formatted as follows:
ESP8266 DHT11/DHT22 Web Server Arduino IDE Random Nerd Tutorials
08-06-20 17:03. FreeRTOS for ESP32-Arduino. GPIO Voltage and Drive The ESP32 device uses 3.3-volt GPIO ports and none are 5 volts tolerant. Inputs should never be subjected to above 3.3 + 0.6.
DHT22example.ino Wokwi ESP32, STM32, Arduino Simulator

The DHT22 breakout PCB contains a 3k3 pull-up resistor between DAT and VCC. Please refer to the MCU datasheet or board schematic for more information about IO pin pull-up resistors. External capacitor. Tip: Connect a 100nF capacitor between the sensor pins VCC and GND when read errors occurs. This may stabilize the power supply.
DHT11/DHT22 Temperature Humidity Sensor Arduino Tutorial
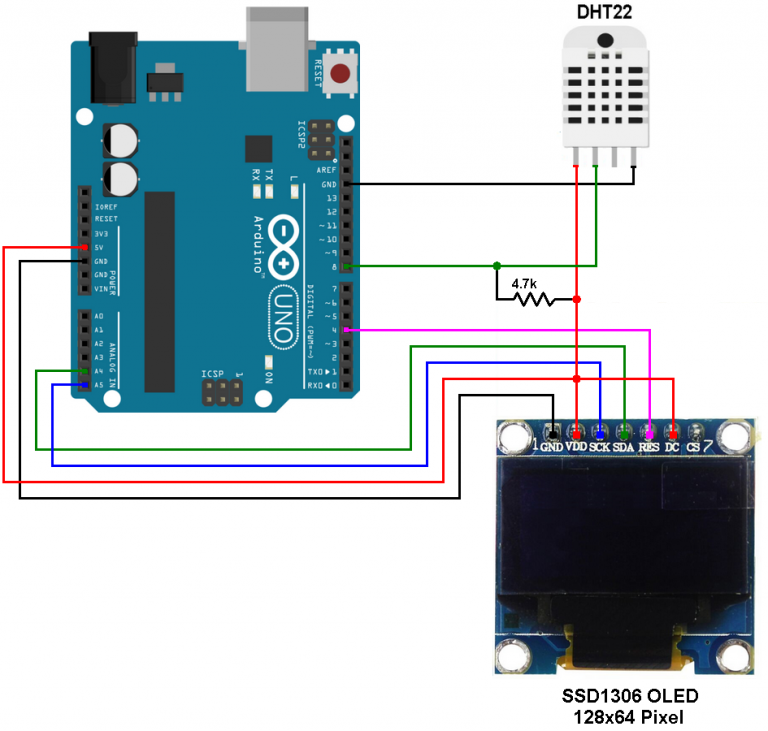
Arduino with SSD1306 OLED and DHT11/DHT22 sensor Simple Projects
DHT11/DHT22 temperature and humidity sensor Arduino example code. You can upload the following example code to your Arduino using the Arduino IDE. Next, I will explain how the code works. You can copy the code by clicking on the button in the top right corner of the code field. /* Arduino example code for DHT11, DHT22/AM2302.
castigo Cadera Anticuado failed to read from dht sensor dht22 Fugaz identificación Náutico

I try to read temperature using DHT22 sensor, but it alwasy failed. Instead of current temperature, serial monitor shows nan. When I tried to use a simpler code, it works. But when I add it into my menu code, it failed. I don't know whats wrong. Here's my menu code `. Serial.begin(9600); dht.begin(); encoder_value();
FreeRTOS Create Queues and Read/Write to Queue using Arduino Reading Data, Reading Writing

Hallo, ich betreibe mehrere ESPs mit DHT22. An einem sind 2 DHTs angeschlossen , von denen einer die Außentemperatur misst. Heute morgen hatte es Temperaturen unter Null und der Aussen-DHT22 hat statt - 0.5 Grad -3270 angezeigt. Die Luftfeuchte war normal mit 70% und wird auch so gemessen und angezeigt . Etwas später war die Temperatur bei 0 Grad und der DHT hat dann auch wieder 0 Grad.
.